本文的目的是模拟一个不同的网络环境用于测试应用在不不同网络环境的表现,经过简单的调研发现了几个不同的工具可以做这件事情。
实现方案
Network Link Conditioner
苹果提供的模拟网络状态的工具,Mac上和iphone上面都可以使用,可以模拟预定的一些网络状态或者增加自定义的网络状态。Charles
Charles是一个抓包工具,本身也可以模拟不同的网络状态,点击Proxy-Throttle Settings,开启Enable Throttling就能模拟不同的网络环境。Augmented Traffic Control(ATC)
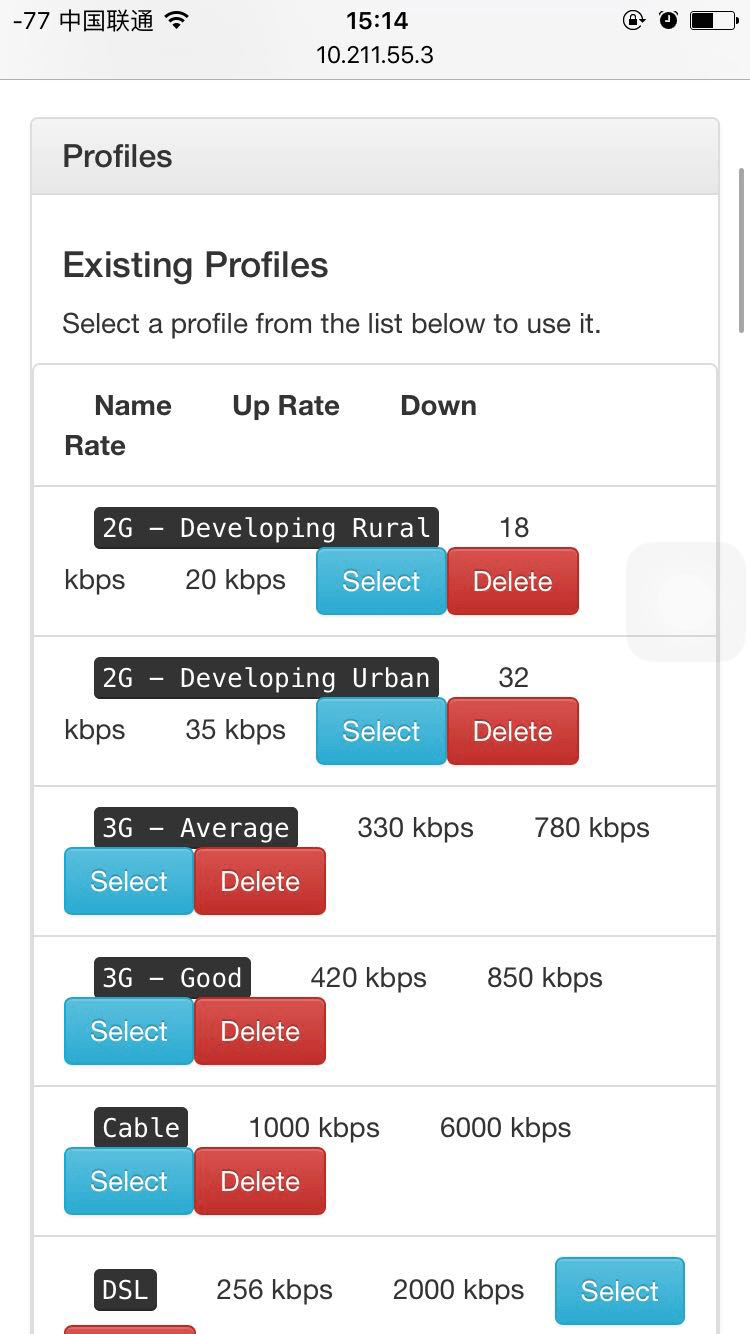
这是facebook开源的网络模拟工具,ATC有两个最吸引人的特点:
- 在手机上通过Web界面就可以随时切换不同的网络环境。
- 多个手机可以连接到同一个WIFI下,相互之间模拟的网络环境各不影响。
最后决定使用ATC在台式机器装个ubuntu系统搭建无线wifi。
Ubuntu共享wifi热点
手上有的是一个TP-Link 725的小型USB无线网卡,官网本身没有提供Linux的驱动,使用:
1 | ethtool -i wlan0 |
查看了下网卡的芯片型号,并在github上面找了一个驱动程序RTL8188EU,安装重启后按照步骤:
1 . 新建一个wifi。
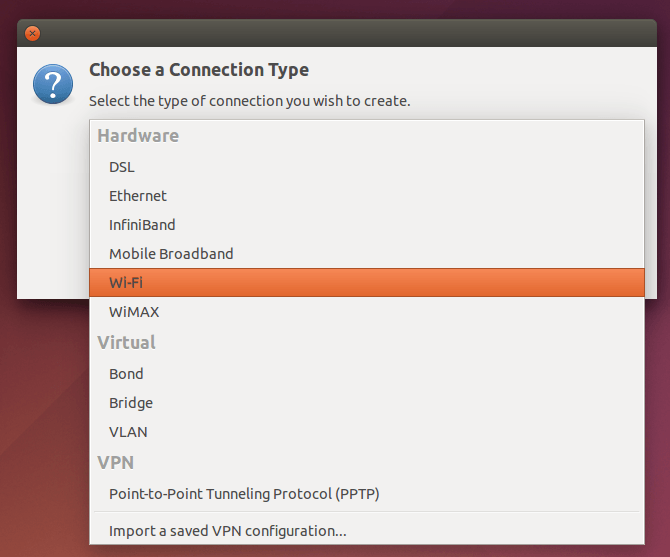
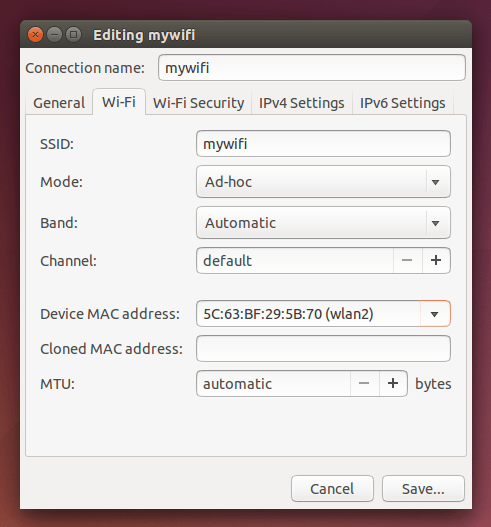
2 . 设置wifi的名字、模式、密码、ipv4选择共享给其它计算机、最后保存。
3 . 一般这个步骤后,电脑会自动连接这个wifi,同时也把这个wifi作为热点共享出去了,如果没有的话,选择连接到隐藏的wifi选择刚刚创建的wifi连接就好了。
但是我使用的TP-Link 725多次没有连接成功,或者开启wifi热点了也上不去网,同时了解到ad-hoc模式的热点Android手机是搜索不到的,只有AP模式的热点才能搜到,这需要网卡本身和驱动同时支持。
所以我换了一个tenda U1 的无线网卡,网上说明是支持软AP的,然后去官网找驱动,官网上的linux驱动最高只支持到4.0的内核,我是ubuntu 14.04,内核版本是4.2.0-38,所以在github上面找到一个驱动rtl8192eu-linux-driver,安装重启,能够开启wifi热点,不过是ad-hoc模式的。所以需要切换到AP模式才能让Android手机搜到连接。
1 . 安装Ap-hotspot
1 | sudo add-apt-repository ppa:nilarimogard/webupd8 |
2 . 配置
1 | sudo ap-hotspot configure |
然后显示:
Your wireless card or driver does not support Access Point mode
明明买的时候写的是支持软AP的啊,怎么就不行了呢?
继续尝试,下载kde-nm-connection-editor,新建一个wifi热点,选择AP模式,保存。连接的时候弹出一个框框:
(32) Access Point (AP) mode is not supported by this device.
阿西吧,看来是真不支持了。后来看到有人也遇到同样的问题,最后买的水晶 MW150U。
再去买了一个水晶的USB网卡,插上后,驱动都不用装,开启AP模式,连接,完全没有问题。
配置augmented-traffic-control
1 . 安装pip
1 | sudo apt-get install python-pip |
2 . 安装ATC
1 | pip install atc_thrift atcd django-atc-api django-atc-demo-ui django-atc-profile-storage |
3 . 创建app
1 | django-admin startproject atcui |
4 . 打开atcui/settings.py增加以下内容到INSTALLED_APPS
1 | INSTALLED_APPS = ( |
5 . 打开atcui/urls.py,增加以下内容到urlpatterns
1 | from django.views.generic.base import RedirectView |
6 . 更新配置
1 | python manage.py migrate |
7 . 运行ATC
1 | sudo atcd |
可以通过-atcd-wan和--atcd-lan来指定网卡。
8 . 运行网站
1 | python manage.py runserver 0.0.0.0:8000 |
9 . 访问http://localhost:8000
发现页面是乱的,,,阿西吧,查看源代码发现导入css和js的代码乱了。
手动找到/usr/local/lib/python2.7/dist-packages/atc_demo_ui/templates/atc_demo_ui/base.html, 进行修改。
1 | <!-- Bootstrap CSS --> |
重新访问后,页面正常了。
10 . 导入官方常用网络状态的设置:
1 | git clone https://github.com/facebook/augmented-traffic-control.git |
选好 指定的模式,然后Update Shaping就可以了。